

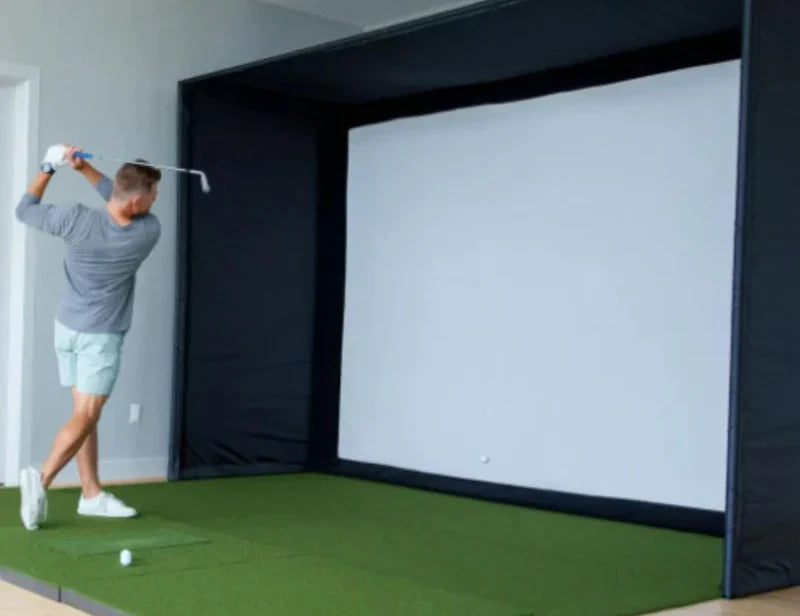


Golfers, imagine stepping into your garage and having a professional-grade golf simulator at your disposal. No more weather delays, expensive tee times, or range sessions—just pure, year-round practice and play. The good news? Building your own garage golf simulator is easier than you think! In this guide, we'll walk you through everything you need to create your dream setup.

1. Assess Your Garage Space
Before diving into equipment, take measurements to ensure your garage can accommodate a simulator. Here are the minimum recommended dimensions:
-
Ceiling Height: At least 9 feet (ideal for a full swing with a driver)
-
Width: Minimum 10 feet for comfortable stance and swing
-
Depth: At least 12-15 feet to allow for ball flight and screen placement
Pro Tip: If your garage is tight on space, consider a short-throw projector and retractable screen to maximize flexibility.

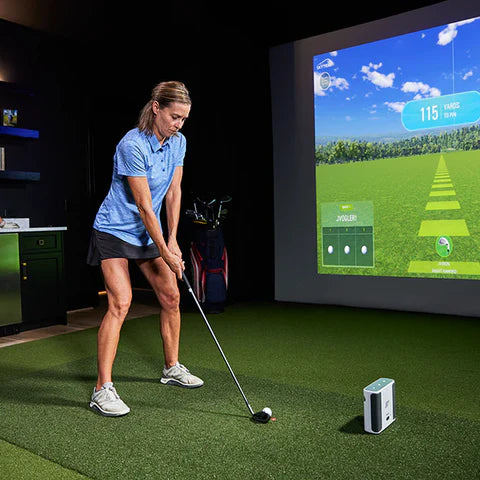
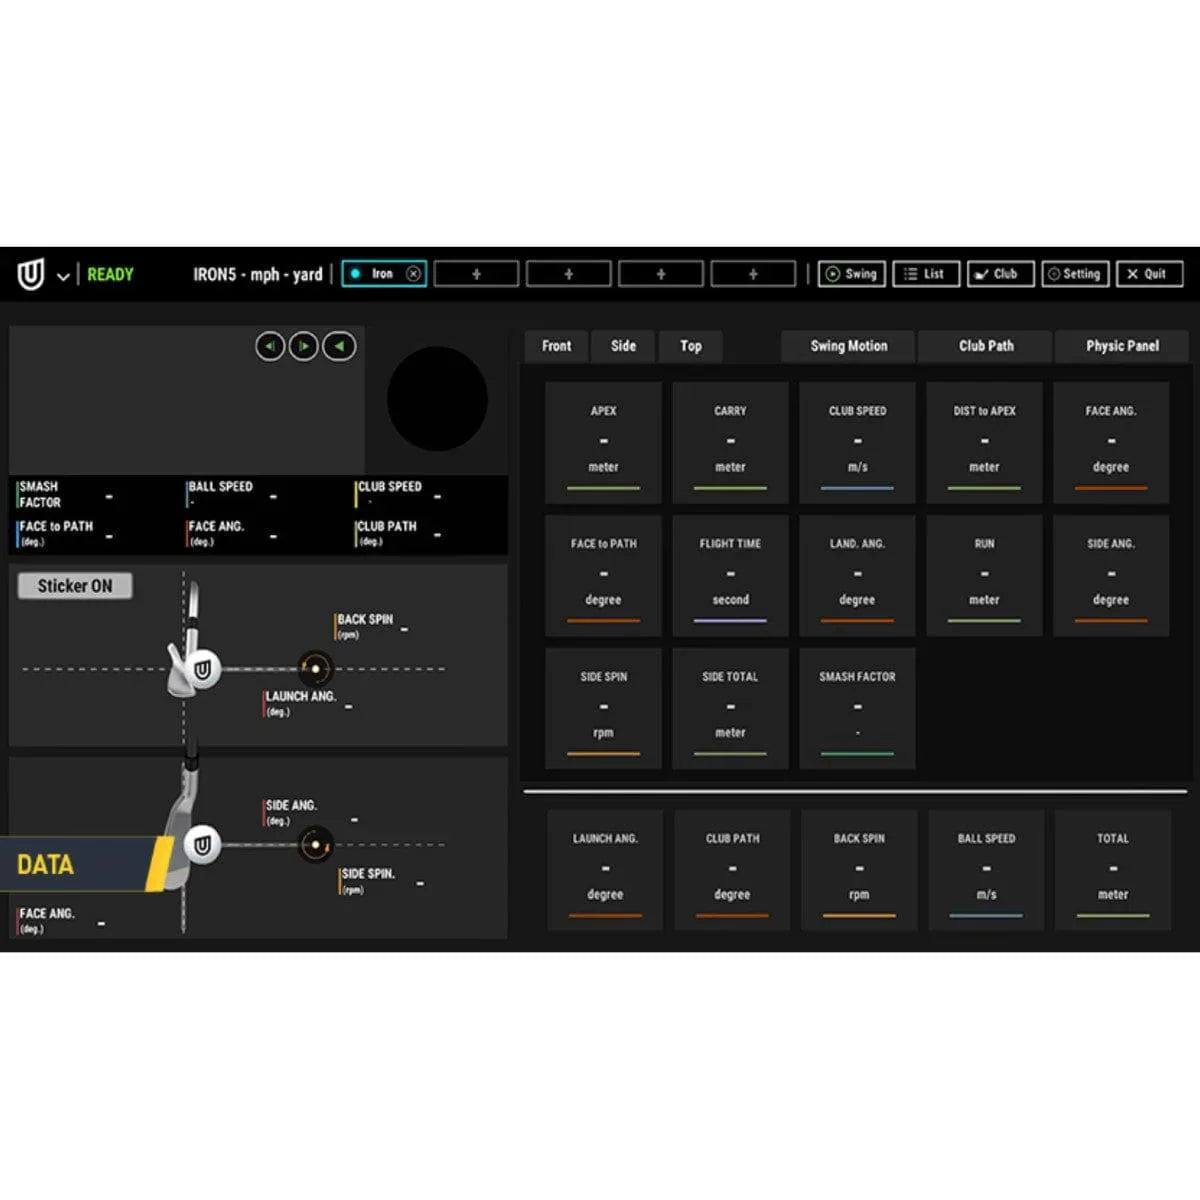
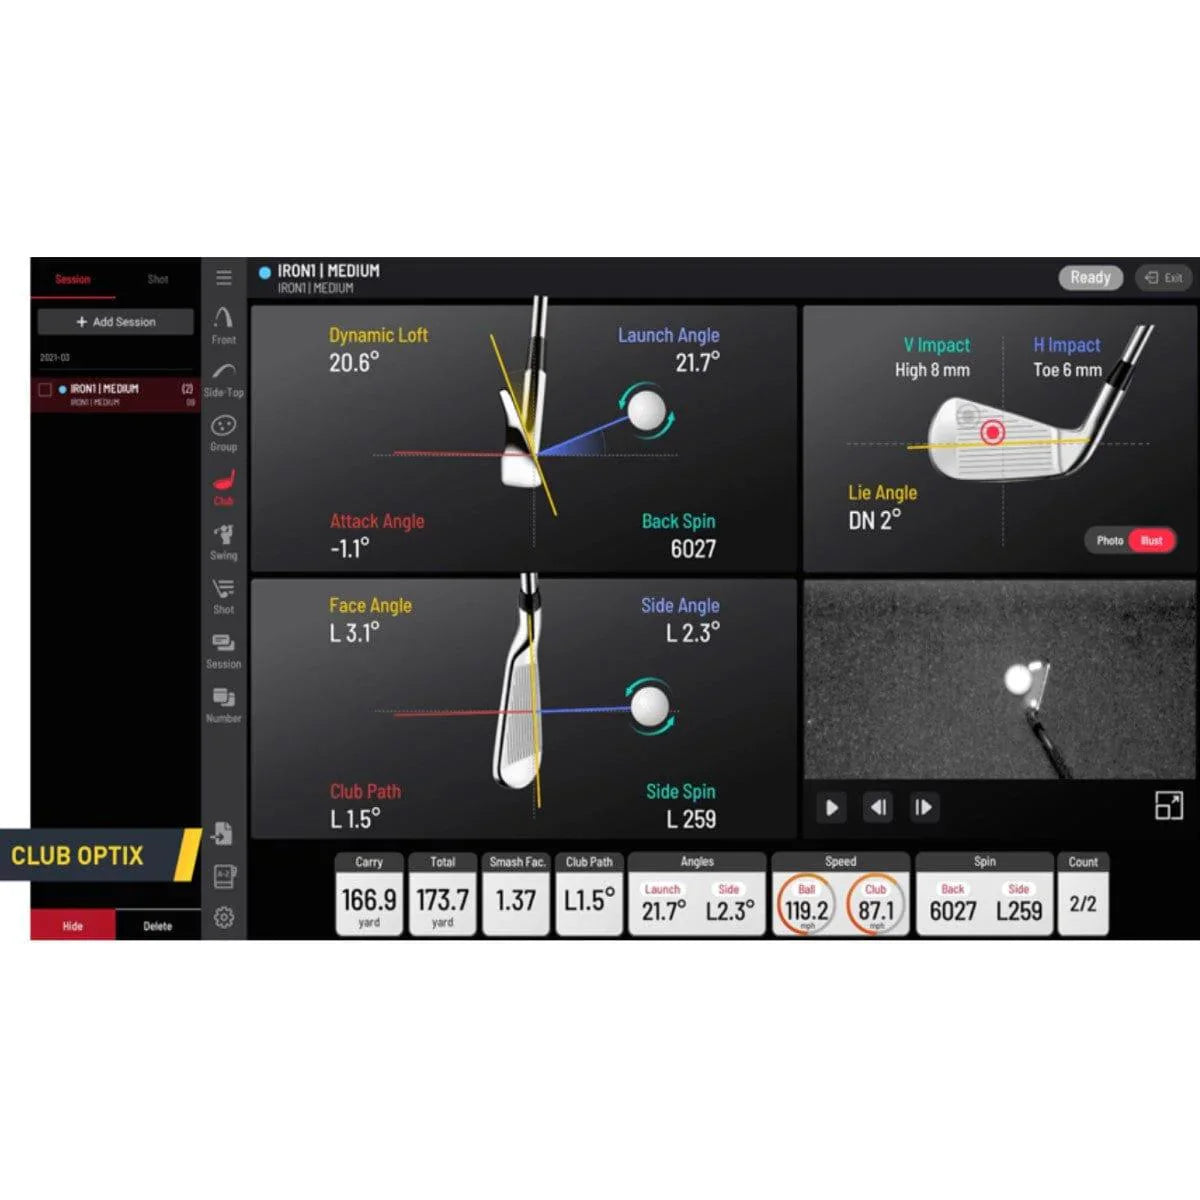
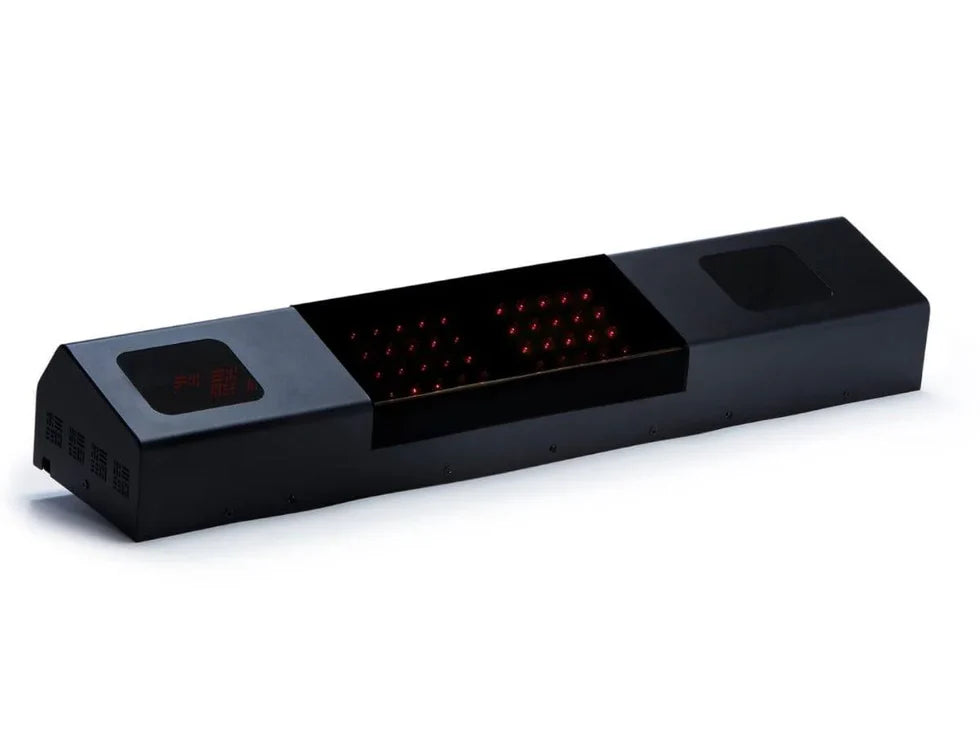
2. Choose Your Launch Monitor
The launch monitor is the heart of your simulator, tracking ball speed, launch angle, spin rate, and more. Here are some great options:
-
Budget-Friendly: Rapsodo MLM2PRO – great for basic swing analysis
-
Mid-Tier: Uneekor EYE MINI – high-speed camera-based accuracy
-
Premium: Uneekor EYE XO2 or Full Swing KIT – professional-level data for serious golfers
Consider your budget and goals—whether it's casual play, game improvement, or professional training.

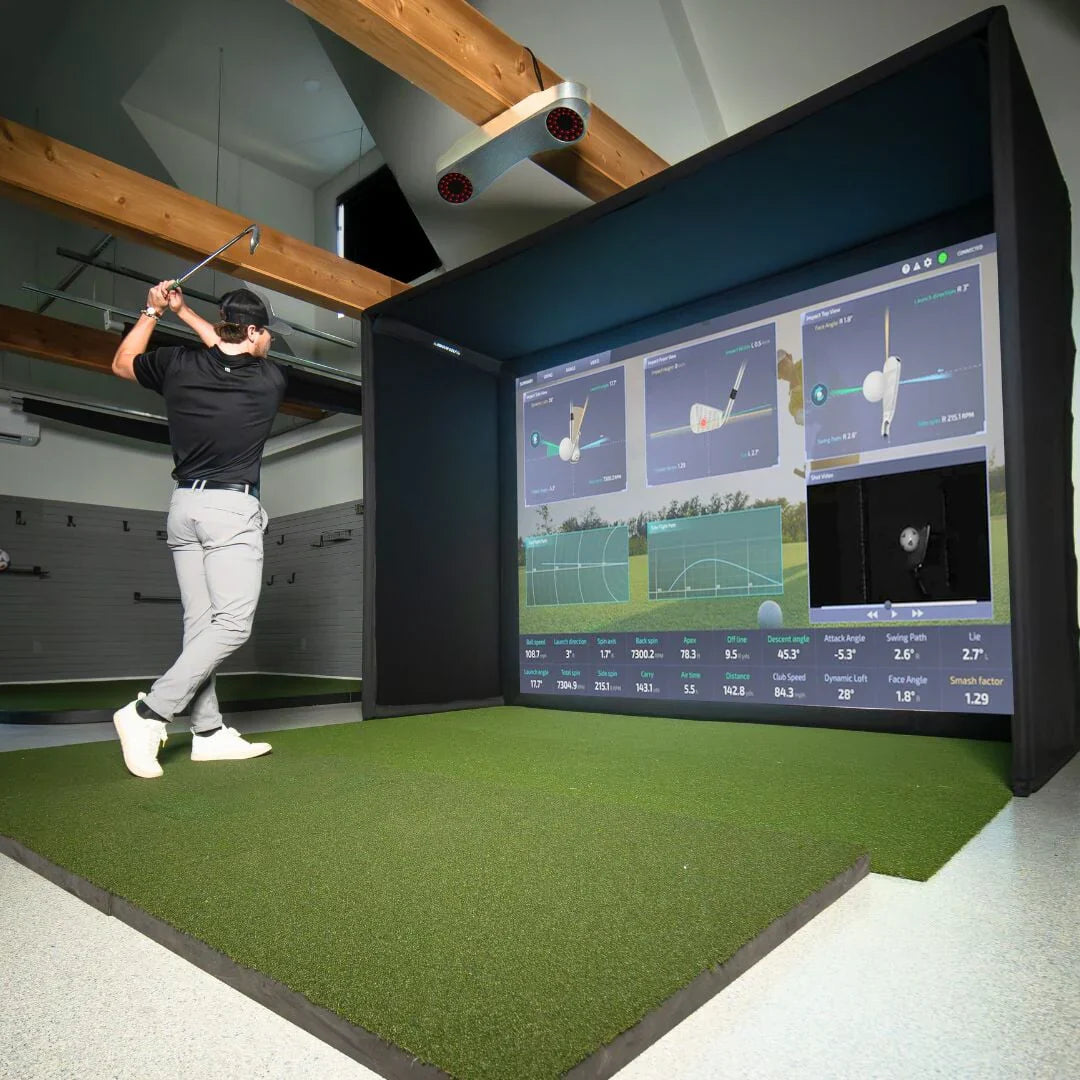
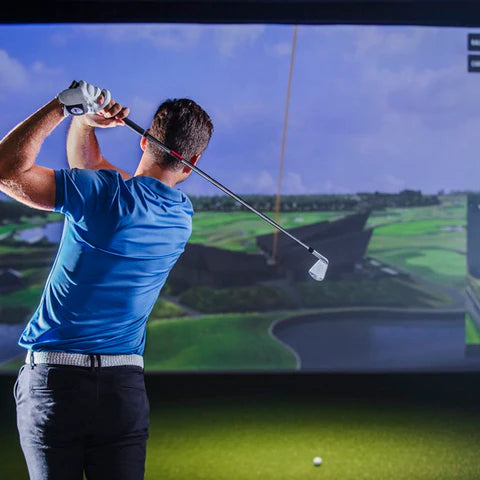
3. Pick a Golf Impact Screen & Enclosure
A high-quality impact screen and enclosure will protect your garage while providing a crisp, immersive experience.
-
Best All-Around: Carl’s Place DIY Enclosure – customizable and durable
-
Retractable Option: HomeCourse Pro Screen – ideal for multi-use garages
-
Premium Quality: Carl's Place Pro Enclosure
For a DIY budget option, you can use a projector screen with blackout curtains or a heavy-duty net.

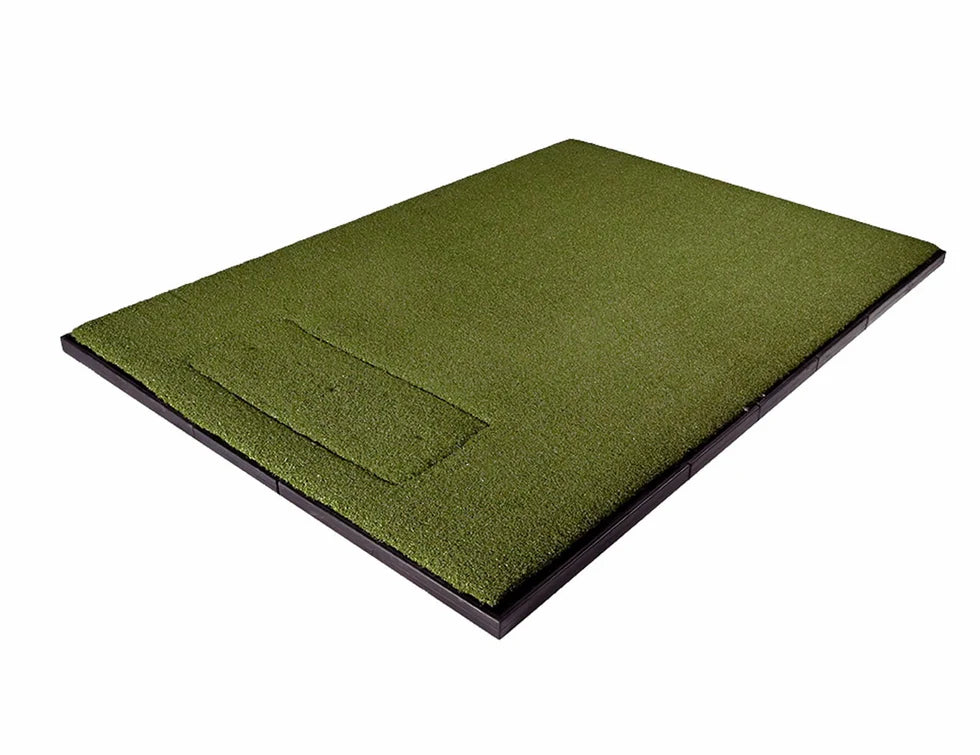
4. Select a Hitting Mat
Avoid injuries and get a true fairway feel with a quality golf hitting mat:
-
Budget: Carl's Place HotShot Mat
-
Mid-Tier: Fiberbuilt Flight Deck (better shock absorption)
-
High-End: TrueStrike Single Mat (realistic turf interaction)
Pro Tip: Use a subfloor or foam padding under the mat to reduce impact on joints.

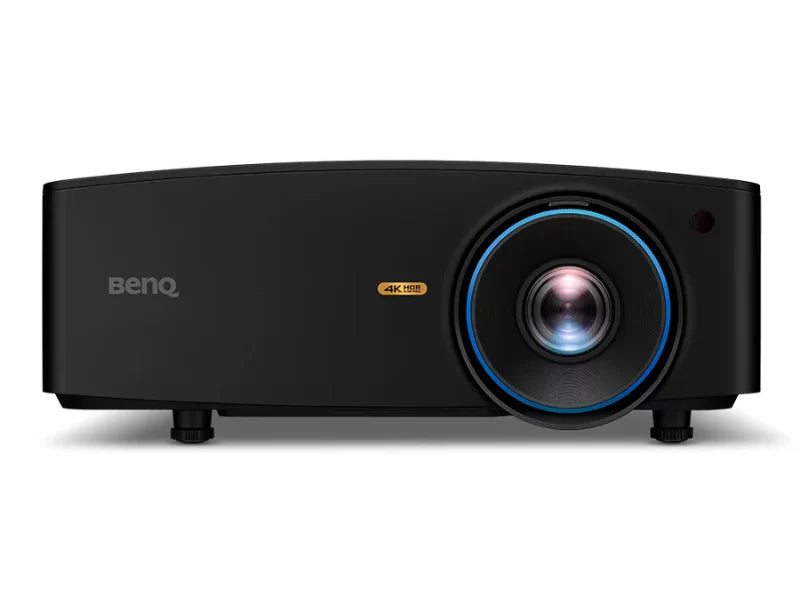
5. Get a High-Quality Projector
A golf simulator projector enhances immersion. Look for high lumens (3000+), low input lag, and 4K or HD resolution:
-
Best for Small Spaces: BenQ LU935ST (short-throw, high brightness)
-
Budget-Friendly: BenQ LH600ST
-
High-End: BenQ LK936ST (4K, premium image quality)
For best results, mount the projector on the ceiling to avoid shadows and optimize space.

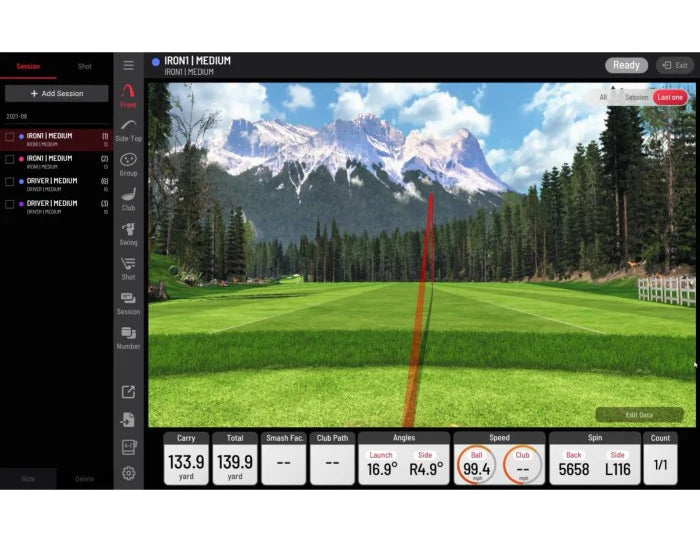
6. Choose Your Golf Simulator Software
The right software turns your garage into a virtual golf course. Some top choices:
-
The Golf Club 2019 (TGC 2019) – Huge course selection with multiplayer
-
Uneekor Refine / Refine+ – Optimized for Uneekor systems

7. Lighting & Setup Optimization
Proper lighting is crucial, especially for camera-based launch monitors like Uneekor.
-
Avoid direct sunlight and use soft, diffused lighting
-
LED track lights or studio lights work best for clear swing tracking
-
Keep the garage organized with cable management and storage solutions

8. Test & Fine-Tune Your Setup
Once everything is set up, test your launch monitor's accuracy and adjust:
-
Projector alignment for a distortion-free image
-
Hitting mat positioning for comfort and swing consistency
-
Software settings to optimize graphics and responsiveness
Pro Tip: Add garage insulation or heaters if you plan to play in colder months!

Final Thoughts: Start Swinging!
With your DIY garage golf simulator, you now have a personal golf haven where you can practice, play, and compete anytime you want. Whether you're fine-tuning your swing or playing a virtual round with friends, this setup brings the game to your home like never before.
🚀 Ready to build your own? Explore top golf simulator gear at Home Golf Direct and start playing today!
